Welcome back, friends! So, this is where we left off:
Image may be NSFW.
Clik here to view.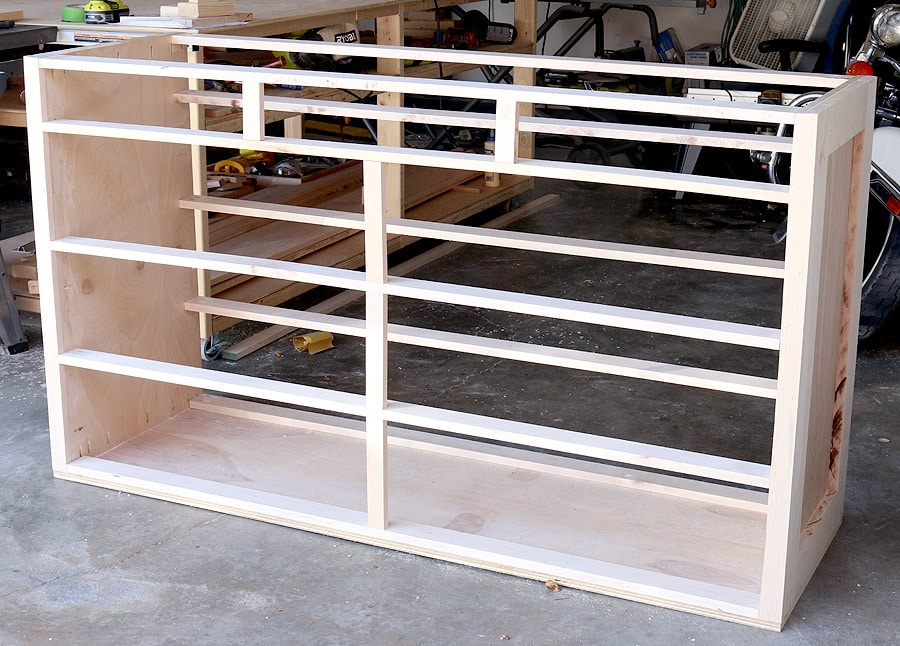 Read the complete tutorial:
- Part One: Building the Carcass
- Part Two: Building the Large Drawers (you’re here!)
- Part Three: Building the Small Drawers
- Part Four: The Final Details
*This post contains affiliate links. To read my full disclosure policy, click here.
Now that the carcass is built, we’ll need to build the large drawers.
First thing’s first: measure the space where the drawer box will go and build your drawers to fit your space. I can’t stress this enough. Measure how wide the drawer space is and subtract about 1/2″ on each side (for clearance) and that’s how wide you’ll build your drawer box. This measurement doesn’t have to be super precise if you’re using center mount drawer slides. Just ensure that the box will fit in the space. Duh, right? Then, measure and cut the sides, front, and back for the drawer box. And cut the bottom panel to size while you’re at it.
Image may be NSFW.
Clik here to view.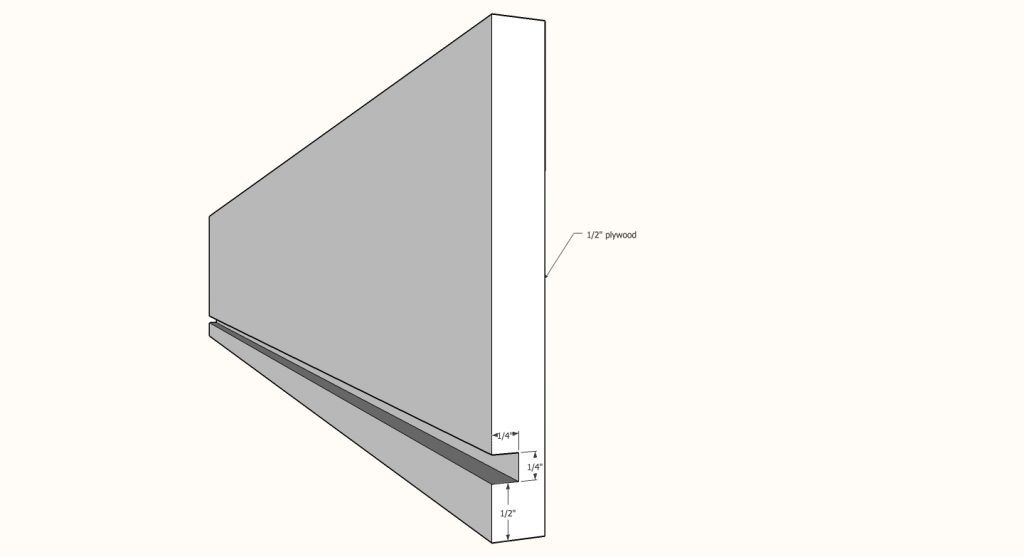 Because I wanted to have a floating bottom for these drawers, I used my router fitted with a 1/4″ straight router bit and routed a groove into the sides for the bottom panel to slide into. I recommend doing a test run (or five) on some scrap wood to get some practice with the router before you go in for the real deal.
Here are my practice runs (embarrassing, I know):
Image may be NSFW.
Clik here to view.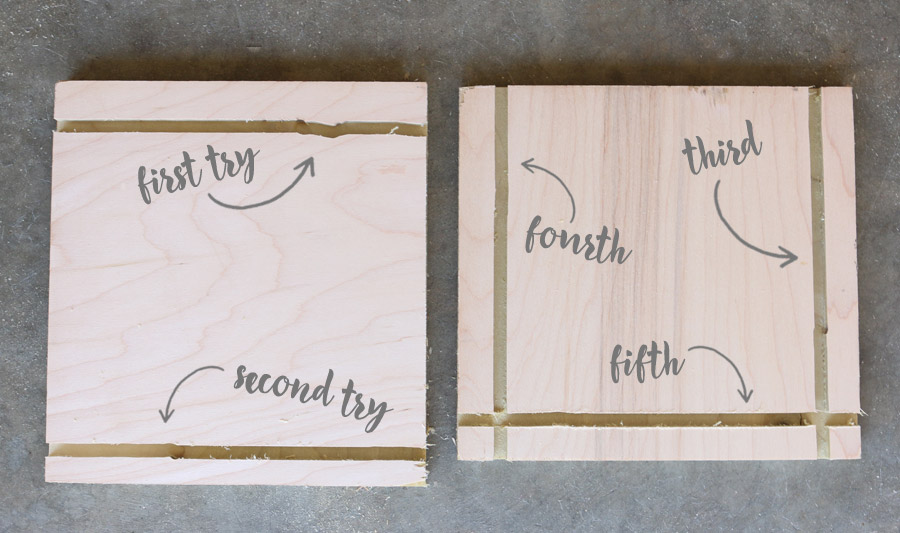 After I felt confident enough on the router, I routed a groove into the four sides of the drawer box:
Image may be NSFW.
Clik here to view.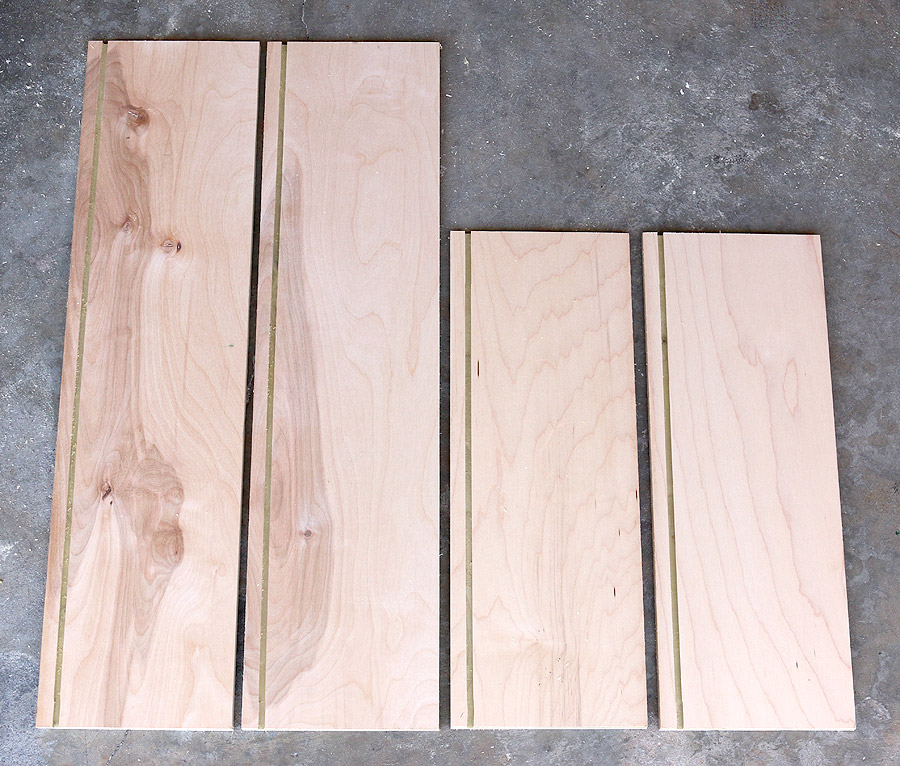 Please tell me I’m not the only one who gets giddy over pretty grooves.
In addition to routing the grooves on the boards, I put a 3/8″ roundover bit on my router and rounded the top edges just as a small, thoughtful detail. It’s the little things, right?
Image may be NSFW.
Clik here to view.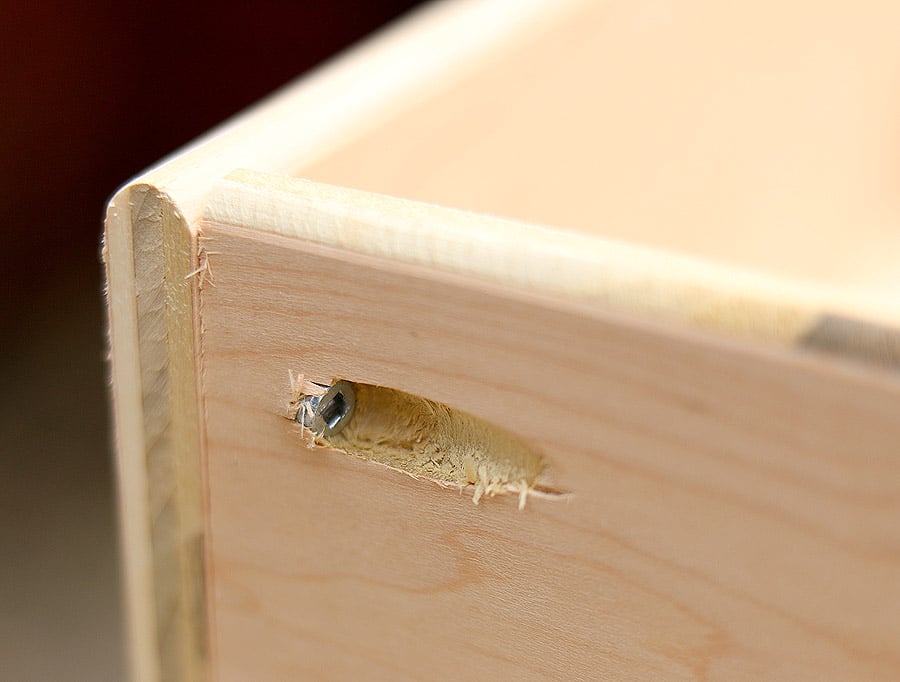 If you’re following me on Instagram or Facebook, you’ll know that I’ve been hanging out in woodworking forums (I know, WHO AM I???) gleaning a ton of insight from the woodworkers and professional cabinet-makers there. I discovered that the consensus where drawer slides are concerned is this: for furniture, use wood slides; for cabinetry, use metal slides.
Image may be NSFW.
Clik here to view.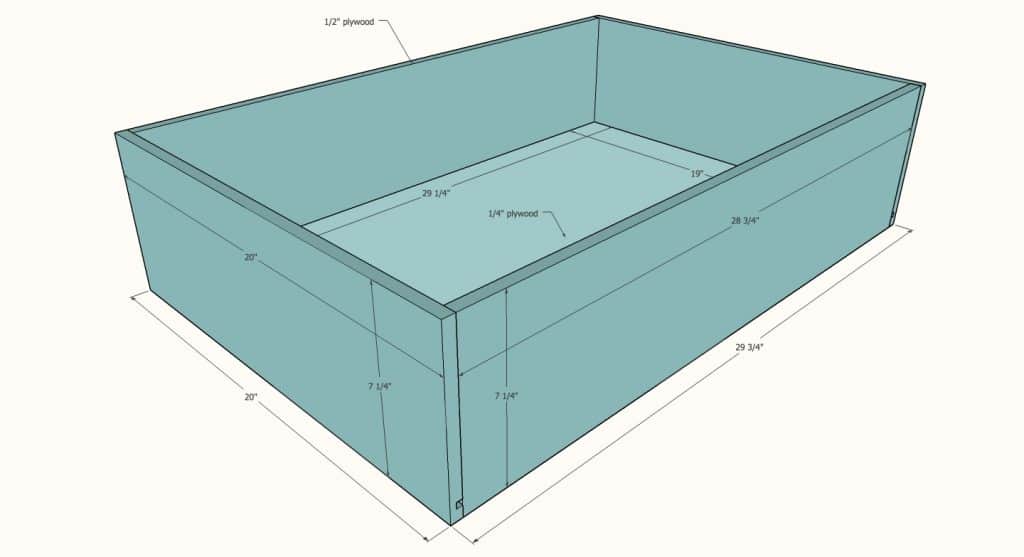 So here I am, trying wooden drawer slides for the first time! Spoiler alert: I love working with wooden drawer slides! I bought these center-mount hardwood drawer slides and at about $10 a pop, I was pleased as punch because it’s about half the cost of those fancy, heavy-duty metal slides. You guys. They were SO easy to install; they’re virtually idiot-proof.
Per the instructions on the slide, I had to notch out a space for the slide to sit flush on the back side of the drawer box.
Image may be NSFW.
Clik here to view.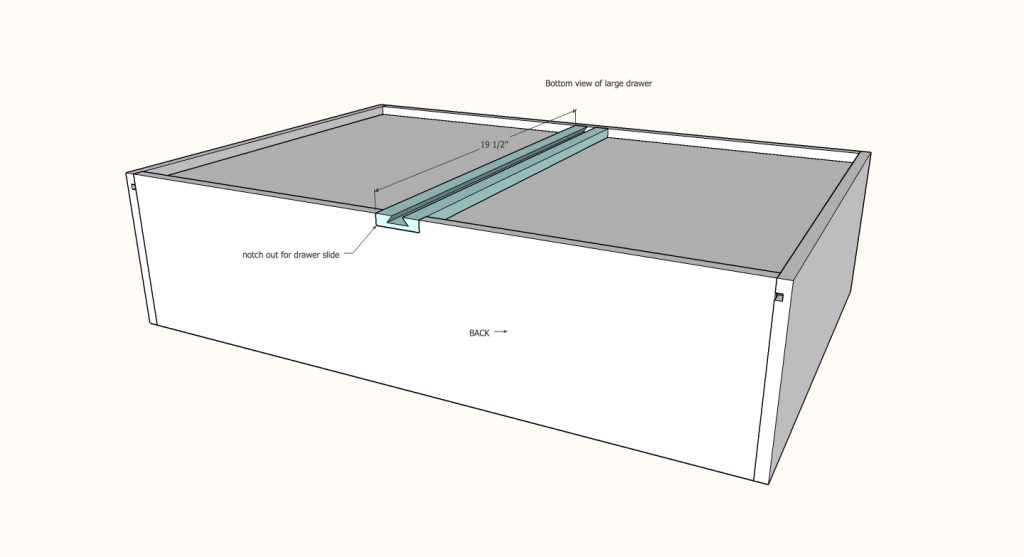
Image may be NSFW.
Clik here to view.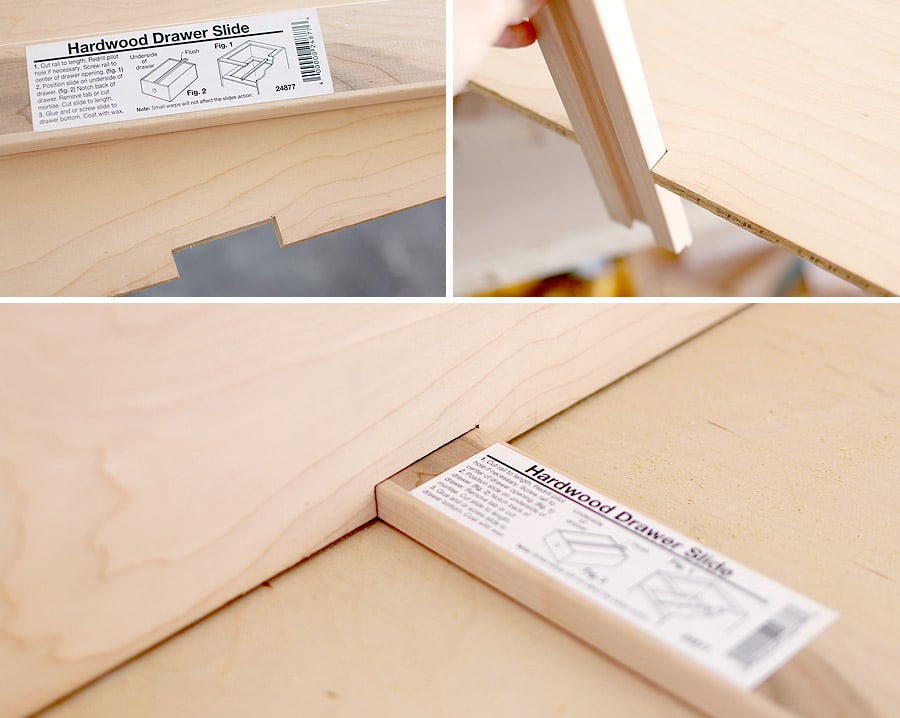 I used 1/2″ hardwood plywood for the drawer boxes, and 1/4″ hardwood plywood for the bottom panel. Can you guess which brand of plywood I used? Yup. Purebond, of course. Duh.
Image may be NSFW.
Clik here to view.
Now just build the box. Attach 3 sides together, slide the bottom panel into the grooves, then attach the back.
Okay, so if you’re following along in this DIY dresser tutorial series, you may remember that I mentioned that it took blood, sweat, and tears to build this thing. I covered the blood and sweat in Part One, so brace yourselves. Here come the tears.
Image may be NSFW.
Clik here to view. When I say “just build the box,” one would assume that I was able to build the drawer boxes with one hand tied behind my back.
Nope. Tears, and lots of ’em. I’m talking full-on ugly crying. Tears of frustration. Anger. DESPAIR.
DESPAIR, you guys!!! Seriously?! I was all, “WHY! WON’T! THIS! THING! DO! WHAT! I! WANT?!?!?!” all while taking a scrap piece of wood and beating the boxes into submission. Not my finest hour.
Image may be NSFW.
Clik here to view.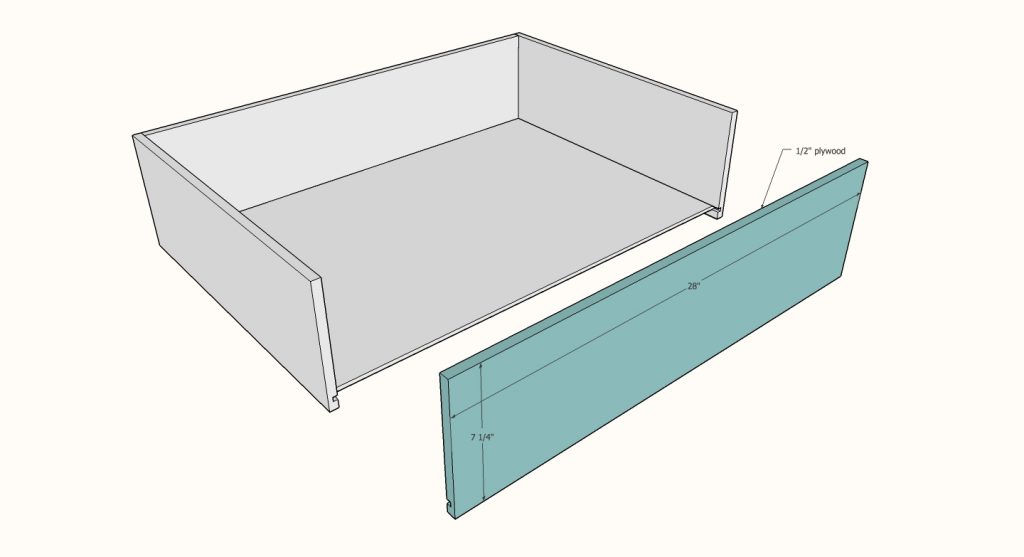 Argh. I can’t tell you how long to took me to attach all four sides while getting the bottom panel to sit into the groove properly. Even with the help of these corner clamps, constructing the boxes with a floating bottom was a pain in the ass. Oh, and by the way – multiply that times SIX.
Are you crying yet? I am. Again. Don’t look at me, I’m an ugly crier.
Image may be NSFW.
Clik here to view.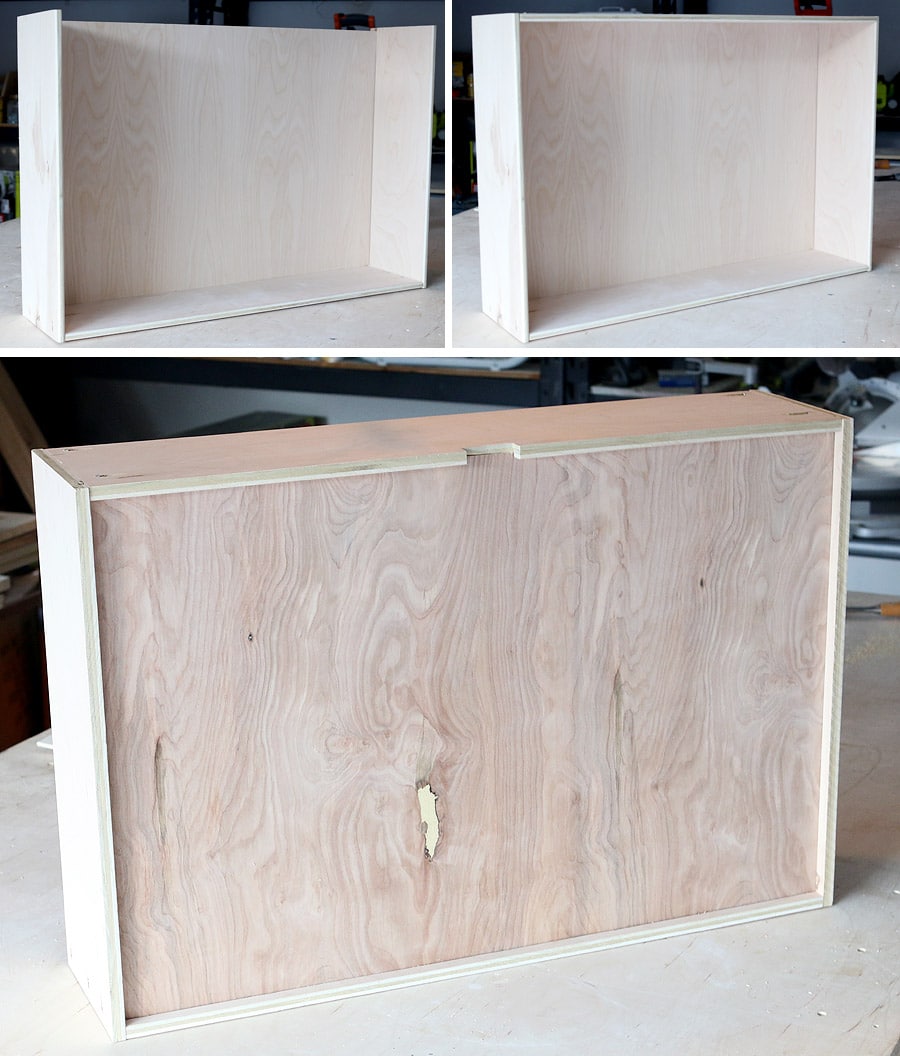 If you want to save yourself some heartache, then take the easy route and just nail and glue the bottom on, but if you want to challenge yourself (and question your existence, sanity, and decision-making abilities), then go for the floating bottom panel.
I used 1″ pocket hole screws to attach the sides, front, and back together. Also worth mentioning: the model K4 and K5 Kreg Jig will drill into material as thin as 1/2″, but for some reason, I couldn’t get my screws to sink in deep enough so that the screw head didn’t stick out. I even special-ordered these smaller pan-head screws and no dice.
I’ll stain and finish the drawer faces before attaching them to the boxes and I ended up taking my forstner bit and drilling a small ‘divit’ in the back of the face for the screw head to sit in, so that everything would sit flush. Surely there is a more efficient way of doing things. Anyone? Kreg? Bueller?
Image may be NSFW.
Clik here to view.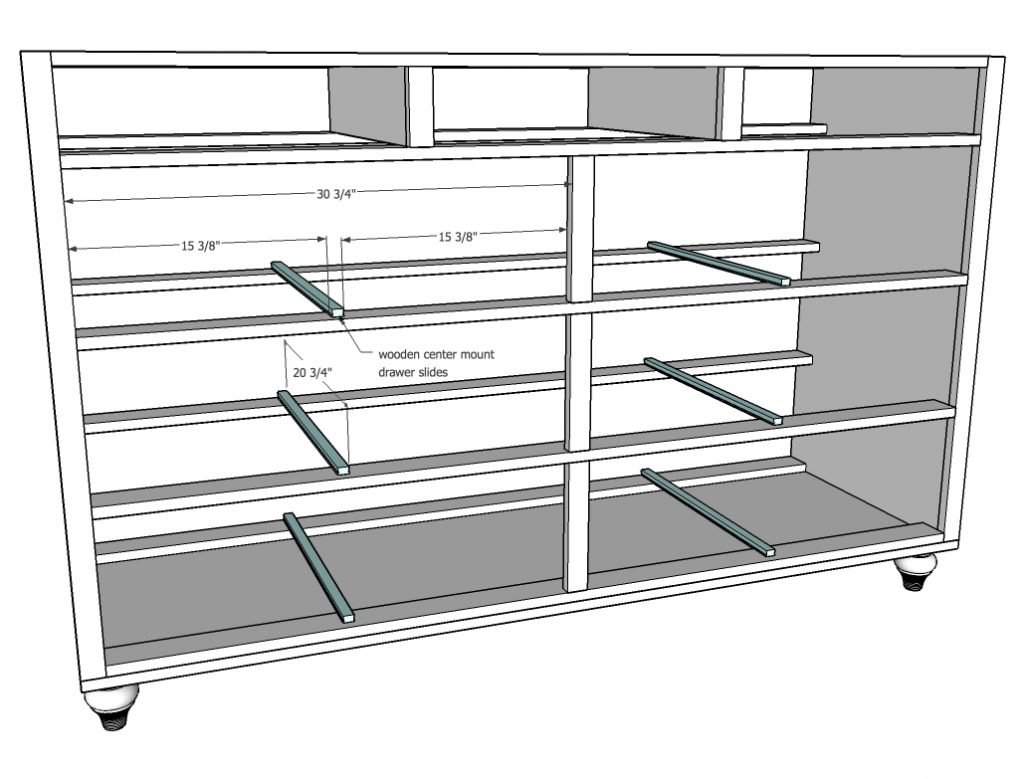 Next, it was time to install the rail on which the slides will run on. I had to use my right angle drill because my standard drill didn’t fit.
Image may be NSFW.
Clik here to view.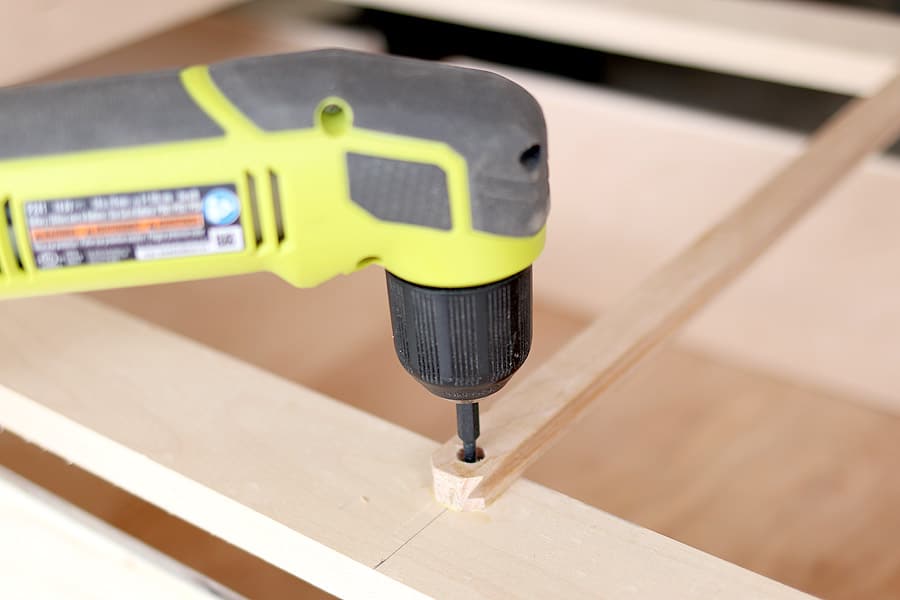 I used 3/4″ pocket hole screws to attach the rail to the carcass. Be sure to countersink the pilot holes so that the screw heads don’t protrude and interfere with the slides. It’ll also be helpful to wax the slides so that they move easily.
Image may be NSFW.
Clik here to view.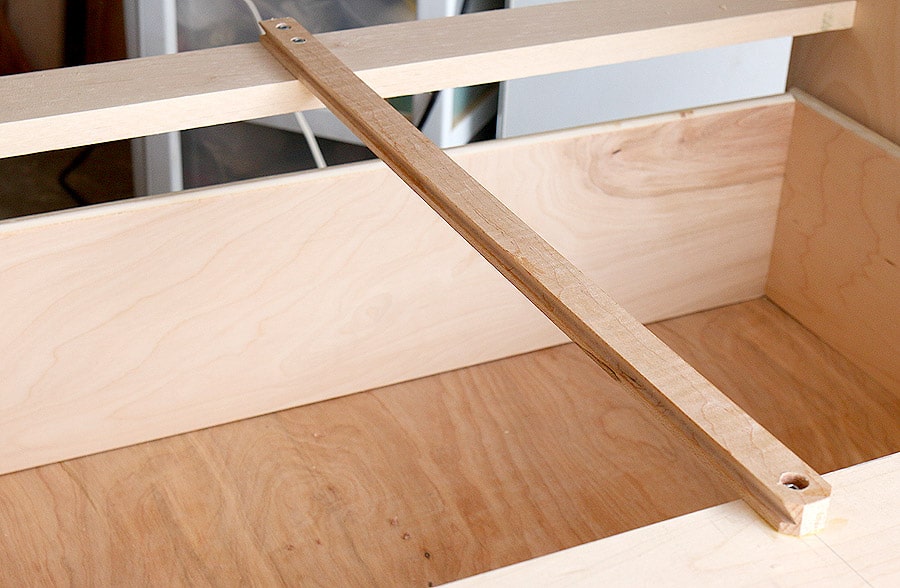 Once the rails are attached, I moved onto attaching the slide to the bottom of the drawer box. I used a square here to make sure the slide was straight. I used wood glue and 2″ brad nails that I shot through the ends of the slide.
Image may be NSFW.
Clik here to view.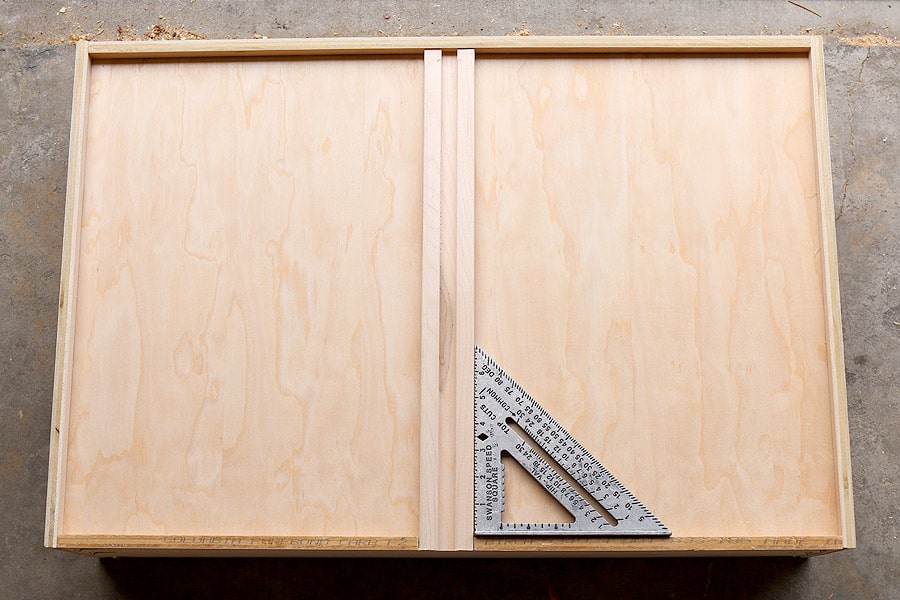 This is what the slides look like from the back. Pretty sweet, huh? And so easy! This ain’t rocket surgery. And good thing too, because my patience has just about run out on this project.
Image may be NSFW.
Clik here to view.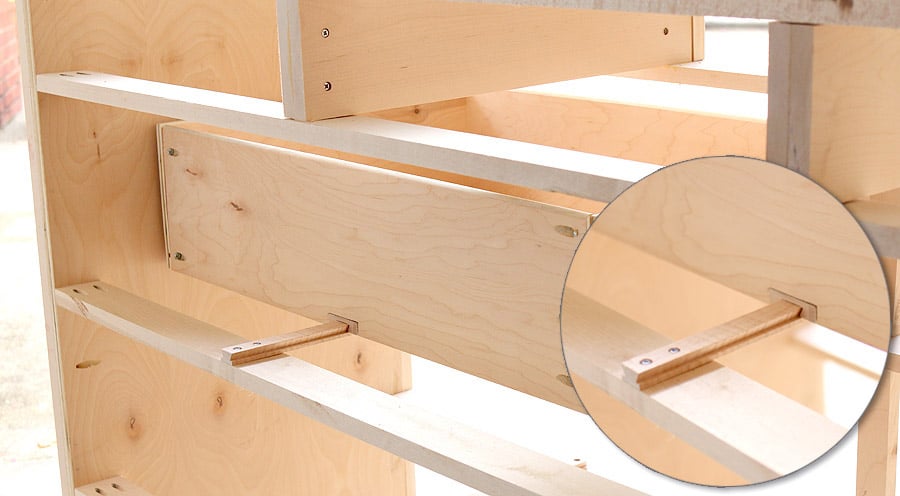 And there you have it! I’m off to do a happy dance now because the most challenging part is OVER.
Boom. Like a BOSS.
Image may be NSFW.
Clik here to view.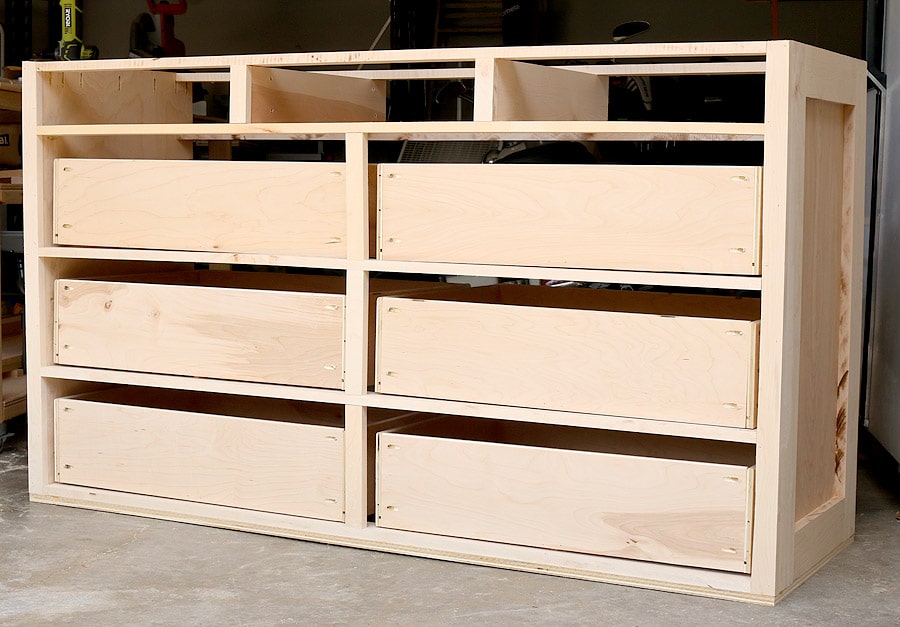 Stay tuned for Part Three of The DIY Dresser Saga. In the meantime, have a stinkin’ outstanding weekend. I’ll just be here celebrating.
Read the complete tutorial:
- Part One: Building the Carcass
- Part Two: Building the Large Drawers (you’re here!)
- Part Three: Building the Small Drawers
- Part Four: The Final Details
The post How To Build A 9-Drawer Dresser {Part Two: The Large Drawers} appeared first on The House of Wood.